Why Use a Raspberry Pi for Your Home Assistant Server?
So, you’ve decided to build a smart home that puts privacy and control first. You’ve probably heard that using a home assistant raspberry pi setup is the most popular way to start, but why is that? Is a tiny, credit-card-sized computer really powerful enough to run your entire home?
In this guide, we’ll dive deep into the reasons a Raspberry Pi is the perfect starting point for your self-hosted smart home. We’ll also cover performance expectations, essential upgrades for long-term stability, and the exact moment you can want to consider a more powerful home automation server.
The Top 3 Reasons to Choose a Raspberry Pi
There are many ways to run Home Assistant, but the Raspberry Pi community is massive for a few key reasons:
- Low Cost: For the price of a nice dinner out, you can get a powerful computer capable of running a sophisticated smart home. It’s the most affordable entry point into the world of self-hosted services.
- Energy Efficiency: A Raspberry Pi uses a tiny amount of electricity (around 3–5 watts), meaning you can leave it running 24/7 without noticing a change in your energy bill.
- Huge Community Support: Because millions of people use this setup, any problem you encounter has likely already been solved by someone else. Tutorials, forums, and guides are everywhere.
Is Raspberry Pi Good Enough for Home Assistant? A Performance Breakdown
This is the most common question, and the answer is a resounding yes, for most people. The home assistant performance on pi 4 is excellent. A model with 4GB or 8GB of RAM can comfortably handle dozens of smart devices, complex automations, and multiple user dashboards without breaking a sweat.
To help you choose, here’s a quick comparison of the Raspberry Pi 4 models:
| Model | Best For | Notes |
|---|---|---|
| Raspberry Pi 4–2GB | Basic Setups | Works fine, but can feel slow if you add many integrations. |
| Raspberry Pi 4–4GB | The Sweet Spot | Perfect balance of price and performance for 95% of users. |
| Raspberry Pi 4–8GB | Power Users | Ideal if you plan to run other services (like AdGuard or Plex) on the same device. |
If you haven’t started yet, our complete installation guide walks you through the entire process from scratch.
Pro Upgrades for a Rock-Solid Home Assistant Server
While a basic setup works great, a few key upgrades can dramatically improve the long-term reliability and speed of your system. Here are the components we recommend for a truly professional setup.
1. Raspberry Pi 4 (8GB Board)
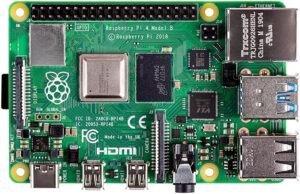
Starting with the 8GB model gives you the maximum amount of headroom for future projects. This ensures your server stays fast and responsive as your smart home grows in complexity.
2. GeeekPi Case with PWM Cooling Fan
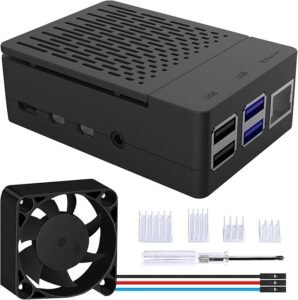
A Raspberry Pi can get hot under constant load, which causes it to slow down (thermal throttle). A case with a large, quiet fan keeps the processor cool, ensuring you get maximum performance 24/7.
3. The SSD Upgrade: Adapter + SSD
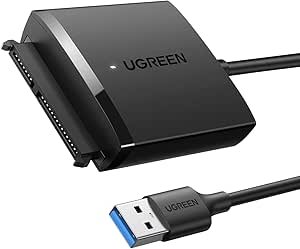
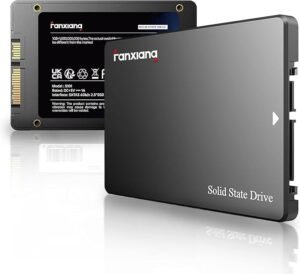
This is the single most important reliability upgrade you can make. SD cards are not designed for the constant writing a server does and will eventually fail. Booting from an external SSD is dramatically faster and infinitely more reliable. You’ll need both the USB-to-SATA adapter and a small SSD.
When to Upgrade from a Raspberry Pi to a VPS
While a Pi is a fantastic start, there are times when it makes sense to move your setup to a Virtual Private Server (VPS). A VPS is a small, private server that lives in a professional data centre, and it offers some key advantages.
- Ultimate Reliability: A VPS has redundant power and internet, so your smart home never goes down.
- No Hardware to Manage: You don’t have to worry about SD cards failing or your Pi overheating.
- Remote Access: Securely access your smart home from anywhere in the world without complex network configuration.
If you find your system becoming mission-critical or if you’re running many other services, upgrading to an affordable Hostinger VPS is the logical next step. It provides the power and peace of mind a physical device at home can’t always guarantee.
Conclusion: The Perfect Starting Point
The home assistant raspberry pi combination remains the undisputed champion for anyone starting their DIY smart home journey. It’s affordable, efficient, and more than powerful enough for even complex setups.
By starting with the right components and keeping the upgrade path in mind, you can build a server that will grow with you for years to come. When you’re ready to explore more powerful options, see our guide on the 4 Best Raspberry Pi 4 Alternatives.
Cross-check compatibility, safety and local rules with official sources before you buy. Australian 240 V wiring, RCM labelling and hub protocols change with firmware updates, so confirm details against manufacturer docs and a licensed electrician when mains power is involved.
Frequently Asked Questions
Why use a Raspberry Pi for Home Assistant?
Low power draw, small size, and enough CPU for typical automations. It is the usual starting point before a mini PC or VPS.
Pi 4 or Pi 5 for Home Assistant?
Pi 5 is faster and better for camera streams and heavy add-ons. Pi 4 still works for lighter setups on a budget.
How much RAM does Home Assistant need on a Pi?
4 GB is fine for beginners. Choose 8 GB if you run many integrations, history, or add-ons alongside HA.
Should I boot Home Assistant from an SD card?
Only for quick tests. Use an SSD via USB for daily use to avoid SD card corruption.
How much does smart home gear cost over five years?
Sticker price is only part of the story. Hubs, repeaters, replacement batteries, cloud subscriptions and electrician call-outs can add up quickly on Australian 240 V installs. We compare total ownership cost in our reviews and link to primary references such as the Home Assistant documentation and the Matter specification when protocol compatibility matters. Budget for at least one spare sensor or switch when you standardise on a hub — mixed-vendor kits often need extra repeaters.
Cross-check compatibility, safety and local rules with official sources before you buy. Australian 240 V wiring, RCM labelling and hub protocols change with firmware updates, so confirm details against manufacturer docs and a licensed electrician when mains power is involved.
Which protocol should you standardise on?
Wi-Fi devices are easy to buy but noisy on your network. Zigbee and Thread/Matter devices usually need a compatible hub or border router, yet they tend to behave better when the internet drops. Before you bulk-buy sensors or switches, decide whether Modern Home Tech readers should prioritise local control, Apple Home, Google Home or Home Assistant — then pick products that match that path instead of mixing three ecosystems by accident. Thread border routers in Australia must still meet RCM requirements for radio equipment.
Which smart home news topics matter most for owners?
Protocol changes, security advisories and tariff updates affect real households more than launch-day hype. We prioritise Matter and Thread compatibility notes, recall notices, and energy price shifts that change whether automations still save money. Firmware regressions that break local control also rank above minor app redesigns — those are the updates worth reading before you buy more gear.
Cross-check compatibility, safety and local rules with official sources before you buy. Australian 240 V wiring, RCM labelling and hub protocols change with firmware updates, so confirm details against manufacturer docs and a licensed electrician when mains power is involved.