How to Install Home Assistant on a Raspberry Pi 4: The Complete Guide (2025)
Raspberry Pi 4 Home Assistant Home Assistant on a Raspberry Pi 4 is a common way to run a private, local smart home hub in Australia. This guide covers the hardware you need, flashing the OS, first boot and the first integrations so you can control lights and sensors without relying on cloud-only apps.
You do not need Linux experience. Allow about 30 minutes for download, flash and initial setup on a stable home network.
What You Will Need for Your Home Assistant Setup
Before we dive into the software, let’s gather our hardware. A successful home assistant raspberry pi setup starts with the right components. Here are our top recommendations for a stable and reliable system.
1. CanaKit Raspberry Pi 4 Starter Kit
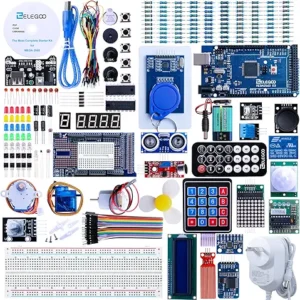
This is our #1 recommendation for beginners. It includes everything you need in one box: the Raspberry Pi 4 board, a proper power supply, a case with a fan, and an SD card. It’s the easiest way to get started without worrying about compatibility issues.
2. SanDisk High Endurance 64GB Micro SD Card
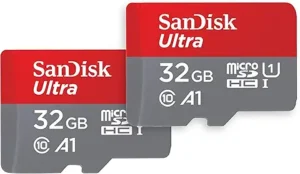
Your Home Assistant server will be reading and writing data 24/7. A standard SD card can fail quickly. This “High Endurance” card is designed for constant use in devices like dash cams, making it a perfect, reliable choice for your server.
3. Short Cat6 Ethernet Cable
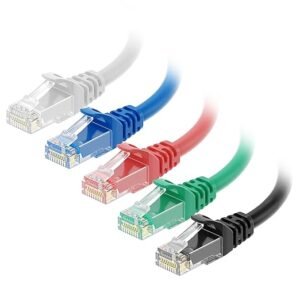
While the Raspberry Pi 4 has WiFi, a wired Ethernet connection is far more stable and reliable for a server. A short 3ft cable is perfect for connecting it directly to your router without creating a mess of wires.
How to Install Home Assistant: A Step-by-Step Guide
With our hardware ready, it’s time for the fun part. We will now install the Home Assistant Operating System onto our SD card.
Step 1: Download the Necessary Software
- The Home Assistant OS Image: Go to the official Home Assistant website and download the image for the “Raspberry Pi 4”. It will be a file ending in
.img.xz. - Raspberry Pi Imager: This is the official tool for safely writing images to an SD card. Download it from the Raspberry Pi website for your operating system (Windows, Mac, or Linux).
Step 2: Flash Home Assistant to Your Micro SD Card
This is the most crucial step in the how to install home assistant process. Don’t worry, the Imager tool makes it simple.
- Insert your Micro SD card into your computer (you can need an adapter).
- Open the Raspberry Pi Imager software.
- Click “Choose OS” and select “Use custom”. Find and select the Home Assistant OS file you downloaded earlier.
- Click “Choose Storage” and select your Micro SD card. Be very careful to select the correct drive!
- Click “Write”. This process will erase the SD card and install Home Assistant. It will take a few minutes.
Step 3: Boot Up Your Raspberry Pi
Once the writing process is complete, you can safely eject the SD card from your computer.
- Insert the flashed Micro SD card into the slot on the bottom of your Raspberry Pi 4.
- Place the Raspberry Pi into its case.
- Connect one end of the Ethernet cable to the Raspberry Pi and the other end to a spare port on your internet router.
- Finally, plug in the USB-C power supply. The Raspberry Pi will automatically turn on and begin its first boot sequence. You’ll see some small red and green lights flicker.
Step 4: Discover and Set Up Home Assistant
Give your Raspberry Pi a few minutes to start up. During this time, it will download the latest updates and configure itself. This can take anywhere from 5 to 20 minutes.
After waiting a bit, open a web browser on your computer (which must be on the same WiFi/network) and go to one of these two addresses:
http://homeassistant.local:8123(Recommended)http://X.X.X.X:8123(Where X.X.X.X is the IP address of your Raspberry Pi.)
You should see a screen that says “Preparing Home Assistant”. Once it’s ready, you’ll be prompted to create a user account. This will be your main administrator account, so choose a strong password!
Frequently Asked Questions
What do I need for Home Assistant?
All you need is a Raspberry Pi 4 (a starter kit is recommended), a reliable Micro SD card, and an Ethernet cable for the most stable connection. All of these are listed at the top of this guide.
Is a Raspberry Pi 4 powerful enough for Home Assistant?
Absolutely. For 95% of users, a Raspberry Pi 4 (especially a model with 4GB or 8GB of RAM) is more than powerful enough to run a fast and responsive smart home with dozens of devices and automations.
Can I use WiFi instead of an Ethernet cable?
Yes, you can. After the initial setup, you can access the Home Assistant settings to connect it to your WiFi network. However, for a server that needs to be online 24/7, we strongly recommend a wired Ethernet connection for maximum stability.
Next Steps: What to Do With Your New Smart Home Hub
You’ve completed the foundational step of your smart home journey. Your DIY smart home hub is online and ready for action. So, what’s next?
Now you can begin adding your smart devices, creating automations, and building beautiful dashboards. Here are a few guides to get you started:
- Read More: Why Use a Raspberry Pi for Your Home Assistant Server?
- Get Connected: How to Integrate Google Home with Home Assistant
What to check first
Confirm scope, price, and timing in writing before you pay a deposit or hand over keys or equipment.
Cross-check compatibility, safety and local rules with official sources before you buy. Australian 240 V wiring, RCM labelling and hub protocols change with firmware updates, so confirm details against manufacturer docs and a licensed electrician when mains power is involved.
Common mistakes to avoid
Skipping written quotes, ignoring reviews from the last 90 days, and assuming every suburb has the same availability.
Cross-check compatibility, safety and local rules with official sources before you buy. Australian 240 V wiring, RCM labelling and hub protocols change with firmware updates, so confirm details against manufacturer docs and a licensed electrician when mains power is involved.
How much does smart home gear cost over five years?
Sticker price is only part of the story. Hubs, repeaters, replacement batteries, cloud subscriptions and electrician call-outs can add up quickly on Australian 240 V installs. We compare total ownership cost in our reviews and link to primary references such as the Home Assistant documentation and the Matter specification when protocol compatibility matters. Budget for at least one spare sensor or switch when you standardise on a hub — mixed-vendor kits often need extra repeaters.
Cross-check compatibility, safety and local rules with official sources before you buy. Australian 240 V wiring, RCM labelling and hub protocols change with firmware updates, so confirm details against manufacturer docs and a licensed electrician when mains power is involved.
Which protocol should you standardise on?
Wi-Fi devices are easy to buy but noisy on your network. Zigbee and Thread/Matter devices usually need a compatible hub or border router, yet they tend to behave better when the internet drops. Before you bulk-buy sensors or switches, decide whether Modern Home Tech readers should prioritise local control, Apple Home, Google Home or Home Assistant — then pick products that match that path instead of mixing three ecosystems by accident. Thread border routers in Australia must still meet RCM requirements for radio equipment.
Which smart home news topics matter most for owners?
Protocol changes, security advisories and tariff updates affect real households more than launch-day hype. We prioritise Matter and Thread compatibility notes, recall notices, and energy price shifts that change whether automations still save money. Firmware regressions that break local control also rank above minor app redesigns — those are the updates worth reading before you buy more gear.
Cross-check compatibility, safety and local rules with official sources before you buy. Australian 240 V wiring, RCM labelling and hub protocols change with firmware updates, so confirm details against manufacturer docs and a licensed electrician when mains power is involved.